How to Use a Friction Peel Tester Effectively?
The effectiveness of adhesive bonds is critical in various industries, including packaging and construction. The Friction Peel Tester plays a vital role in assessing these bonds. According to the Adhesive and Sealant Council, approximately 20% of adhesive failures are due to improper surface preparation and testing methods. This statistic highlights the need for reliable testing.
Expert John Smith, a renowned materials engineer, stated, “A Friction Peel Tester provides crucial insight into bond performance.” This technology measures the peel strength, offering a quantitative evaluation of adhesive reliability. Accurate data helps manufacturers enhance product quality.
While the Friction Peel Tester is essential, it is not infallible. Operators must ensure proper calibration and consistent testing conditions. Variations can lead to misleading results, causing potential failures in real-world applications. Hence, understanding both the capabilities and limitations of this tester is paramount in achieving optimal bonding outcomes.

Understanding the Basics of Friction Peel Testing
Friction peel testing is crucial in evaluating the adhesion strength of materials. This method helps determine how well two surfaces bond under stress. Understanding its basics can enhance the accuracy of tests. According to a recent industry report, the failure rate for adhesive bonds can reach up to 30% in real-world applications.
The process measures the force needed to peel apart bonded materials. It requires a controlled setup to ensure consistency. Proper alignment and uniform speed are essential. Even small variations can lead to misleading results. Inadequate preparation can compromise data integrity. Standard practices suggest maintaining a consistent environment to reduce variability.
Many industries rely on friction peel testing for quality assurance. For example, in packaging, ensuring strong seals prevents product contamination. The American Society for Testing and Materials recommends specific methods to improve precision, yet users often face challenges. Familiarity with equipment is vital, but occasional miscalculations can occur. Reflecting on past results can offer valuable insights for future tests.
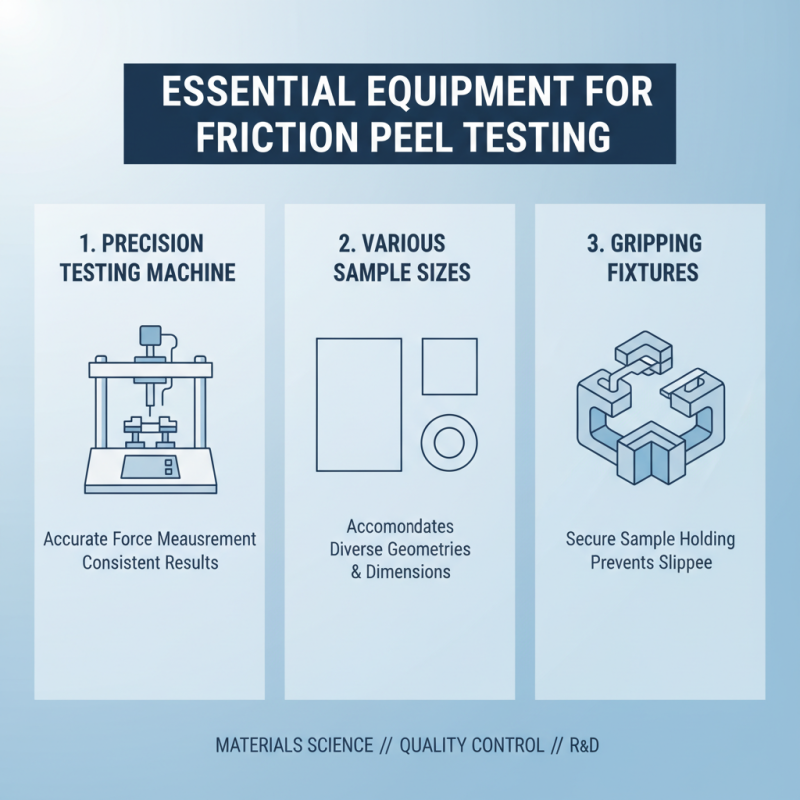
Essential Equipment Required for Friction Peel Testing
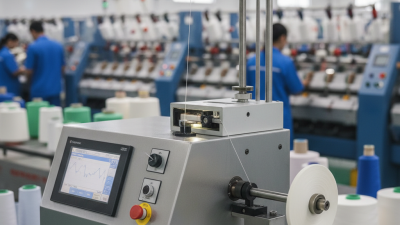
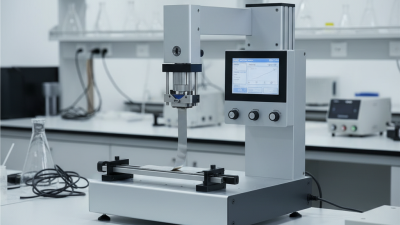
Friction peel testing is essential in material science. To conduct these tests effectively, specific equipment is necessary. A precision testing machine is critical. It needs to measure forces accurately and provide consistent results. The machine must accommodate various sample sizes and geometries.
Additionally, adhesives play a significant role in the testing process. Using different adhesive types can affect the peel strength significantly. A recent report noted variations in adhesion strength based on adhesive selection, which impacted results by up to 30%. Test samples must be prepared carefully. Ensuring uniform surface conditions can help minimize variables that might skew data.
Calibration tools are also vital for reliable results. Regular calibration ensures that the testing machine provides accurate measurements. Some labs neglect this, resulting in flawed data. Attention to detail in the setup phase is needed. Mistakes can lead to misleading conclusions, so a thorough understanding of the equipment is crucial.
Step-by-Step Procedure for Conducting a Friction Peel Test
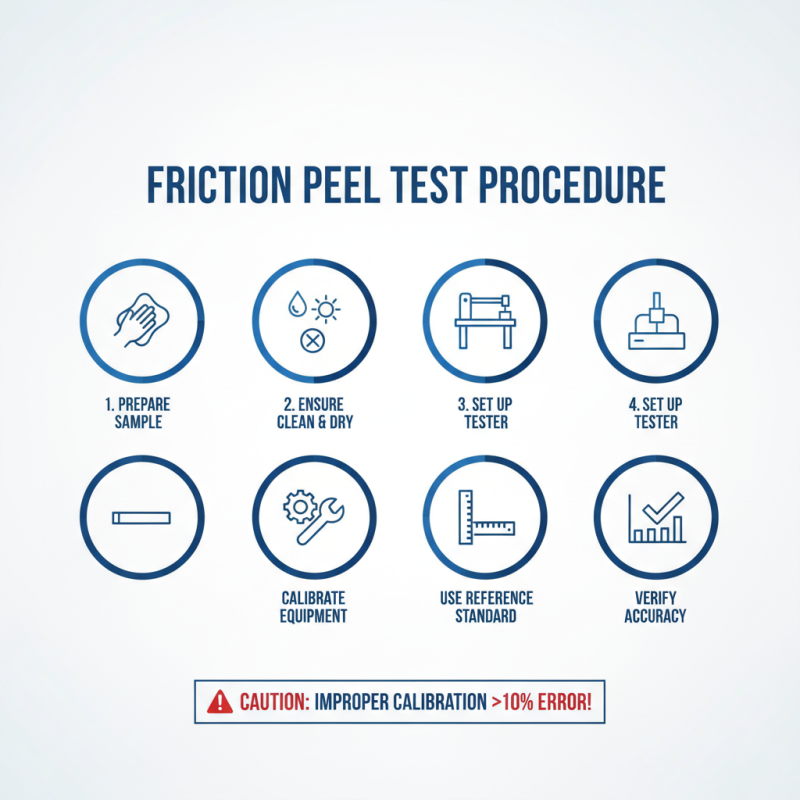
Conducting a friction peel test requires careful attention to detail. Begin by preparing your sample materials, ensuring they are clean and dry. The peel tester must be set up on a stable surface. Calibration is crucial. Use a reference standard to verify the tester's accuracy. According to industry reports, improper calibration can lead to discrepancies of over 10%.
Once calibrated, attach your sample securely to the tester. Maintain a consistent speed during the test, typically around 100 mm/min. Inconsistent speeds can skew data. It’s important to monitor the angle of the peel as well. An angle of 90 degrees is standard, but variations can affect results significantly. Some studies suggest that angles deviating by even 5 degrees can change adhesion strength readings.
After completing the test, analyze your data carefully. Look for any anomalies or patterns that emerge. Share your findings with your team, but be open to critique. Peer review can highlight issues you may have missed. Remember, every test presents an opportunity for improvement. Reflecting on your methods can lead to better outcomes in future tests.
Interpreting and Analyzing Friction Peel Test Results
Understanding friction peel test results is crucial for materials characterization. This test assesses adhesive bonds and helps determine their strength. Analyzing results involves examining peel force versus displacement graphs. Look for trends indicating material behavior under stress. Sudden drops in peel force may signal bond failure.
Tips: Measure temperatures during tests. Temperature can significantly affect results. Ensure consistency in testing conditions. Variations can lead to misleading conclusions. Document any anomalies or unexpected behaviors.
Consider different adhesives and substrates. Each combination yields unique results. Study the data patiently. Sometimes, repeated tests show different outcomes. Reflect on these variations to understand their causes. This critical insight is valuable for improving product formulation and performance.
Friction Peel Test Results Analysis
This bar chart represents the average peel strength values (in N/mm) of various material combinations tested using a friction peel tester. The data illustrates the effectiveness of different adhesives under varying conditions.
Common Pitfalls and Best Practices in Friction Peel Testing
Friction peel testing is crucial for evaluating adhesive performance. However, many users encounter common pitfalls during this process. A frequent mistake is inadequate surface preparation. Skipped cleaning or roughening can lead to unreliable results. It's essential to ensure that the surfaces are clean and free from contaminants. Even a small residue can significantly impact adhesion.
Another issue arises when testers overlook environmental factors. Temperature and humidity can affect both the adhesive and the substrate. Conduct tests in a controlled environment for accuracy. Many testers often ignore the importance of consistent application speed. Variations can lead to inconsistent data. Using a stopwatch can help maintain uniformity.
Lastly, some users rush through data analysis, which can lead to oversights. Take the time to analyze results carefully. Repeating tests when results seem off can provide clarity. Reflecting on this part of the process can reveal hidden insights. Adopting these best practices will ensure more reliable and meaningful outcomes in friction peel testing.
How to Use a Friction Peel Tester Effectively? - Common Pitfalls and Best Practices in Friction Peel Testing
| Dimension |
Value |
Notes |
| Test Sample Thickness (mm) |
0.5 - 5.0 |
Optimal thickness for accurate results. |
| Peel Angle (degrees) |
90 |
Standard peel angle used in tests. |
| Testing Speed (mm/min) |
100 |
Recommended speed for consistency. |
| Environmental Conditions (°C) |
23 ± 2 |
Ideal testing temperature for adhesion. |
| Type of Adhesive |
Acrylic |
Common adhesive used in testing. |
| Expected Peel Strength (N/mm) |
2.0 - 10.0 |
Range of peel strength for assessment. |


 Home
Home